Wednesday, November 23, 2011

Turkey Projects


This turkey project from Reading Confetti is made from pretzel sticks a paper cup, some 'googly eyes' and construction paper for feet and colored with magic markets.  Dip the pretzel sticks in yellow and orange and red Wilton Candy Melts from Michael's or your favorite local craft store, trace the turkey's body on a white paper cup, and cut out some feet from construction paper.  Fun, a little messy, but that's what crafts are all about! This is a great fine motor project and the tactile stim from the pretzels and chocolate are great for the kids (even though they'll never know iit!) The kids can take home a proud Thanksgiving centerpiece for the holidays. 


Don't want to add to the sugar intake of your students? How about this cool fine motor project from Teach Preschool.  You can make it using pipe cleaners or feathers, both work well for the turkey's tail feathers. Whatever you have on hand will work!


Again, the base is a paper cup, wrapped in some brown construction paper, add a beak and eyes with a marker. Poke some holes in the bottom of the cup, and have your students add the tail feathers. Again, a perfect tatctile experience for the kids s well as a creative outlet using their fine motot skills. 


Monday, November 21, 2011

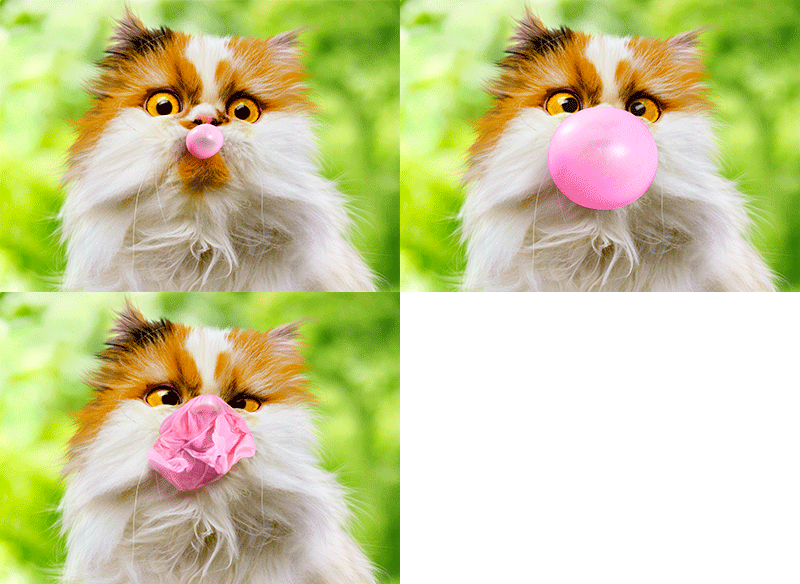
Pink Gum

Sorry, I know it's not a project, but it does make me smile! Find out where to get one of these fun cards at Avanti Press' web site and click on 'Home'. 

Thursday, November 17, 2011

It's Turkey Time Again!


Every year at Thanksgiving we look for fun Thanksgiving crafts to do with our students.  The Thanksgiving turket and the Pilgrims and Indians provide a wide range of crafts to make with your children.  This is one I remember making when I was a child, so I guess it's true that some things never go out of style!


To make the turkey shown each child needs:
A variety of colors of colored paper in brown, red, yellows and orange colors
1 piece of background paper to paste on
1 large circle for the turkey's body\
Triangles, rectangles or squares for tail feathers
Triangles, rectangles or squaresfor a beak
Marker or crayon for eyes
Glue Stick or glue pots


This project helps children develop fine motor skills, creative thinking, imaginative thinking, learn shapes and colors, and the use of multi-media for art projects.

Visit Teach Preschool's web site for more photos of how to do this craft as well as further directions.  Teach Preschool is a great resource for a variety of projects.  Craft photos courtesy of: Teach Preschool

Saturday, October 15, 2011

Pumpkins and Ping Pong?


OK, I admit, these pumpkins with the ping pong ball eyes are the brainchild of the folks at Martha Stewart.  But what a great idea for your preschoolers for a change from triangle cutouts in a plain orange pumpkin.  Granted, Martha's crafters version will probably look better than what your kids churn out, but hey, you may be teaching the future Martha's! I love the idea of thinking outside the box for the eyes for this pumpkin by using the ping pong balls decorated with markers.  If you are worried about your preschoolers cutting the mouth out, consider using paint or gluing some felt cutouts onto the pumpkin.  I guarantee the kids will get a real kick out of making the bloodshot eyeballs!


The photo above is another idea from Martha.  The eyes of the pumpkins are made from PUSH PINS! Genius! Worried about the safety issue of letting the kids use the push pins?  Use some pompoms from the craft store.  Safer and just as attractive.


But my favorite is the bat-pumpkin in the back of this photo.  Just add some black poster board or balsa wood wings and you have bat-o-lanterns!  The bat-o-lantern looks best if shown off on top of a clear plastic cylinder so it looks like it's flying.  Don't use full size pumpkins for these, instead smaller 'individual' size pumpkins are perfect. 

Trying to save some $$ on this project? Work with plain orange pumpkins, they won't cost as much as the white ones and will look just as great for the kids.  Another option? Have students work in a group instead of each having an individual pumpkin.  They can show off their work at school instead of taking it home.  If your school has the space, consider planting some pumpkins next year, you may not have a large enough crop for the whole school but you won't need to buy as many. 

Thursday, October 13, 2011

Supply & Demand Crafting


As teachers we all know how expensive supplies can be.  So whenever possible I like to reuse/re purpose items that parents have on hand or are easy to get.  Think about different projects you've made in your classroom repurposing products, I'd be happy to have you guest post.

This project, perfect for a mother's day gift, grows chives for the kitchen.  Easy to do and inexpensive.  All you need are a couple seed packets and some dirt and some paint to decorate the jar with.  Decorations can be as elaborate as you like and you don't have to use paint, use anything you have on hand.  Decorations can be holiday specific or just for fun. 

This project teaches students about how things grow and to enjoy planting.  It also encourages repurposing and caring for the environment. 

Eco-Project For Nursery School


Collage is a French word which means “glue.” The term was coined by Braque and Picasso in the beginning of the 20th century, when collage became a distinctive part of modern art. (link for quote and photo)

Color collages made from old magazines, paste and some recycled paper are fun for times you want to let your children explore their own design and art skills by using recycled materials.  Keep a lot of old magazines on hand for times you want to try this since you'll need a lot of photos that are all the same color family for this project.  Your other option is to have each child bring in some old magazines to use for the project.  Do you have any budding Picassos in your classroom?  You're sure to have some enthusiastic artists which is what counts. 

Consider adding a clothesline and hanging their 'masterpieces' for "Back To School Night" or Parent Meetings. 

What do you need for this project? Recycled large pieces of colored paper, glue sticks, children's scissors, and old magazines. 

This project encourages color identification, increased use of fine motor skills, following three step directions and decision making.

Wednesday, October 12, 2011

Making Your Own Pumpkin Patch With Kellogg's Rice Krispie Treats


Joey Fortman and friends have once again delivered some great Rice Krispie Treat recipes, these perfect for school halloween celebrations.  Their pumpkin patch treats have a unique flavor, no boring Krispie treats here!

For their recipe go to Joey's site, Real Mom Media.  You'll also find out how to win $100... hmmm... $100.... I do love to shop and every dollar helps! 

These treats are adorable and so much fun to make. Decorating them lets your students show off their creative genius. So you all end up a little sticky, so what? You'll have fun, the kids will have fun, and it's a great project to teach measuring, following directions, and provide students with a variety of tactile experiences.  Visit Joey's site for the recipe and more great pictures and try them at home, even if they're just for you and your family!

Friday, October 7, 2011

Recipes for October-Halloween Is Coming!


Need food for a  classroom party? Love the marshmallows at the bottom right dipped in colored white chocolate.  Someone sent this to me in an email without letting me know where they got the photo, so if anyone knows let me know so I can give them credit for it. 

The orange Kellogg's Rice Krispie treats are also so cool.  Follow the recipe on the side of the RK box, add food coloring.  Use green icing for leaves.  Add mini Tootsie Rolls are stems (genius idea!).  Fun, easy and eatable!  Good to teach measuring, following multi-step directions and increase tactile awareness.

Saturday, October 1, 2011

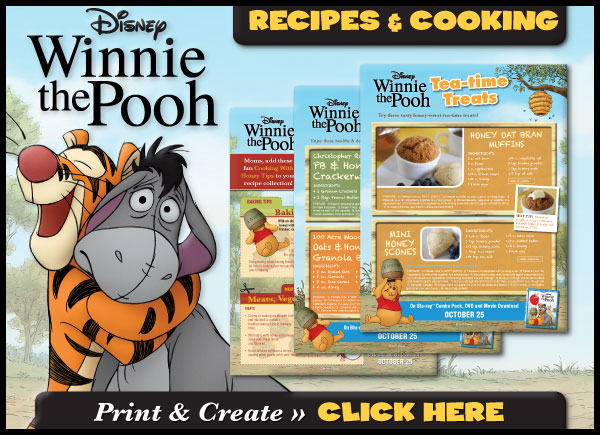
Free Honey Recipes


Download Printable Recipes and Cooking!
September was National Honey Month (Yes, we apologize for having missed this, but thanks to MamaCheaps reminder here are some free honey related recipes -- better for you and your students (or your own family) and honey tastes good too!  After all, who can argue with the wisdom of Winnie The Pooh? 
To get these great recipes go visit MamaCheaps and click to download the info.  Thanks Mama!
Oh and just to remind you, Pooh has a new movie coming out on DVD and Blu-Ray on October 25, 2011. 


Yields 10–12 bars

Yields 2 snacks


On Blu-ray

Combo Pack, DVD and Movie Download

October 25

Monday, September 26, 2011

It's Take A Child Outside Week - What Can You Do Outdoors?


Every year Take a Child Outside Week is from September 24 to September 30.  Take a Child Outside Week was initiated to help children discover more about the world of nature.  Their web site gives anyone who works with children or has them great ways to help your children discover the outdoor world. They also provide other great resources to find other ideas.

Remember when communing with nature was the 'in' thing? Take A Child Outside Week wants to reinforce the idea that we need to take our students or children outside. When we take them outside you let them go back and learn to appreciate nature.  So take the time to share the wonders of the outdoor world with children. 


The goals of Take A Child Outside Week are to help children develop a better understanding and appreciation of their environment as well as develop an interest in exploring it.

Other things going outside does that help children:
  • it helps them feel connected to the natural world
  • it helps kids focus in school
  • it reduces chances of obesity
One great idea you can put to use this week or any week is to take a Shape Walk.  When you go on a walk, have children look for shapes outside.  Have children point out squares, circles, rectangles and other shapes they see in nature as they walk along. 

This helps hone their observation skills and reinforce shape learning. It also enhances gross motor skills and observation skills.  Best of all taking a Shape Walk is FREE! No cost to parents or nursery schools--what more could you want? Free lessons, fresh air, sunshine, exercise, and it's HEALTHY! What could be better.

Healthy Snack For Preschoolers -- Or Growing Things and Eating Them Too


It's always a challenge to find healthy snacks for preschoolers.  So when you can incorporate making a healthy snack into your lesson plan it's a real bonus. This project from Taste and Tell does just that. 

To try planting this carrot patch you need: 

small terra cotta pots
hummus (you can sub whipped cream cheese mixed with ranch salad dressing dry mix instead, it's not as healthy but the kids might like it better)
baby carrots
curly parsley
small paper or plastic cups 3oz size
toothpicks
spoons

Directions:

Open hummus and spoon it into small cups that will fit inside your flower pots (acting as your 'dirt'.)

Spoon hummus into small cups that will fit inside the pots.
Use a toothpick to push a small hole in the larger end of the carrots and insert a small piece of parsley to represent carrot tops.  Use three or four carrots per pot. (Depending the the dexterity of your group, you may want to poke the hole during your prep time)
Children can then plant their carrots in their pots by pushing them down into the hummus.
 
An added bonuses? If you want to expand the lesson, plant some carrot seeds in the pots after the snack has been eaten and start your own class carrot garden or the kids can take home their pot and seed to plant at home.

Why do I love this lesson?  It starts with students making their own healthy snack and doesn't need any cooking, so it's great for classrooms without kitchens. Students then move onto planting the seeds to make their own carrot garden--a whole new lesson.  And they can feed what they grow to their classroom guinea pig or make a whole new snack from their garden.  It can lead to a lesson on food groups and nutrition or a discussion about growing your own food.  This is a lesson that keeps on giving!

Recipe originally from Family Fun.

Sunday, July 24, 2011

Milk and Food Coloring Make Magic-Great Science Project


This combination of food coloring, dish detergent and milk is a magical way to showcase art or science! Watch, listen and learn! Thanks to YouTube!

Tuesday, July 5, 2011

Fun With Music and Movement


Looking for a fun CD for to encourage students or your children to sing and dance? Just purchase a copy of Rhythm Train! You'll see some famous folks as well as some not so on this album, but they will quickly become school and family favorites! The video from YouTube above is a sample of some of the music on the CD. There are discounts for schools and the amount of fun and possible lesson plans packed into this CD make it well worth the price. Take the time to review the site and then get ready for some serious fun the day it arrives on your doorstep!

Two of my faves are the Thank You Song and I'm a Pirate. You can listen to outtakes of these on their web site. Mamasource by Mamapedia has a great deal for these going right now, just head over to their web site.

Monday, July 4, 2011

Handprint Fun For Patriotic Holidays


This isn't my project but one I found on Lightening Bug Lit's blog.  Some simple red, white and blue paint and some construction paper (not to mention so serious clean soap and water to clean up with!) and you'll be able to make this fun project, great for the 4th of July or other patriotic holidays. (think Flag Day, Memorial Day, etc.)  This engages your students' tactile sense and also helps them follow multiple directions.  It teaches colors and leads into lessons about history and flags.  Not to mention it's FUN! So break out those paints and start playing!

Welcome to Making Those Little Things Count

As a preschool teacher I sometimes find myself in search of a new project, one that will challenge my students but be fun for them too.  This blog will give you some ideas I've tried or am planning on trying.  If you're a teacher who has a great idea I'm always open to having a guest blogger come in and post for the day.  I love my readers to comment too so feel free to add your two cents! Enjoy reading!